Mesh with SALOME#
In this tutorial, we demonstrate how to use SALOME to generate 2D meshes for use in FESTIM.
SALOME is a powerful open-source platform for CAD modelling and mesh generation. It provides a graphical interface to define geometries, assign mesh parameters, and export meshes in the MED file format.
Objectives
Make a 2D geometry with SALOME
Generate a 2D mesh with SALOME and export it to a MED file
Convert the mesh to XDMF format, compatible with DOLFINx
Load and use the mesh in a FESTIM simulation
This approach is useful when working with more complex geometries that are easier to define and control in a graphical environment like SALOME.
Building the geometry in SALOME#
This is a step-by-step guide to meshing with SALOME 9.12.0.
The geometry will be a 2x1 rectangle with two unit squares as subdomains.
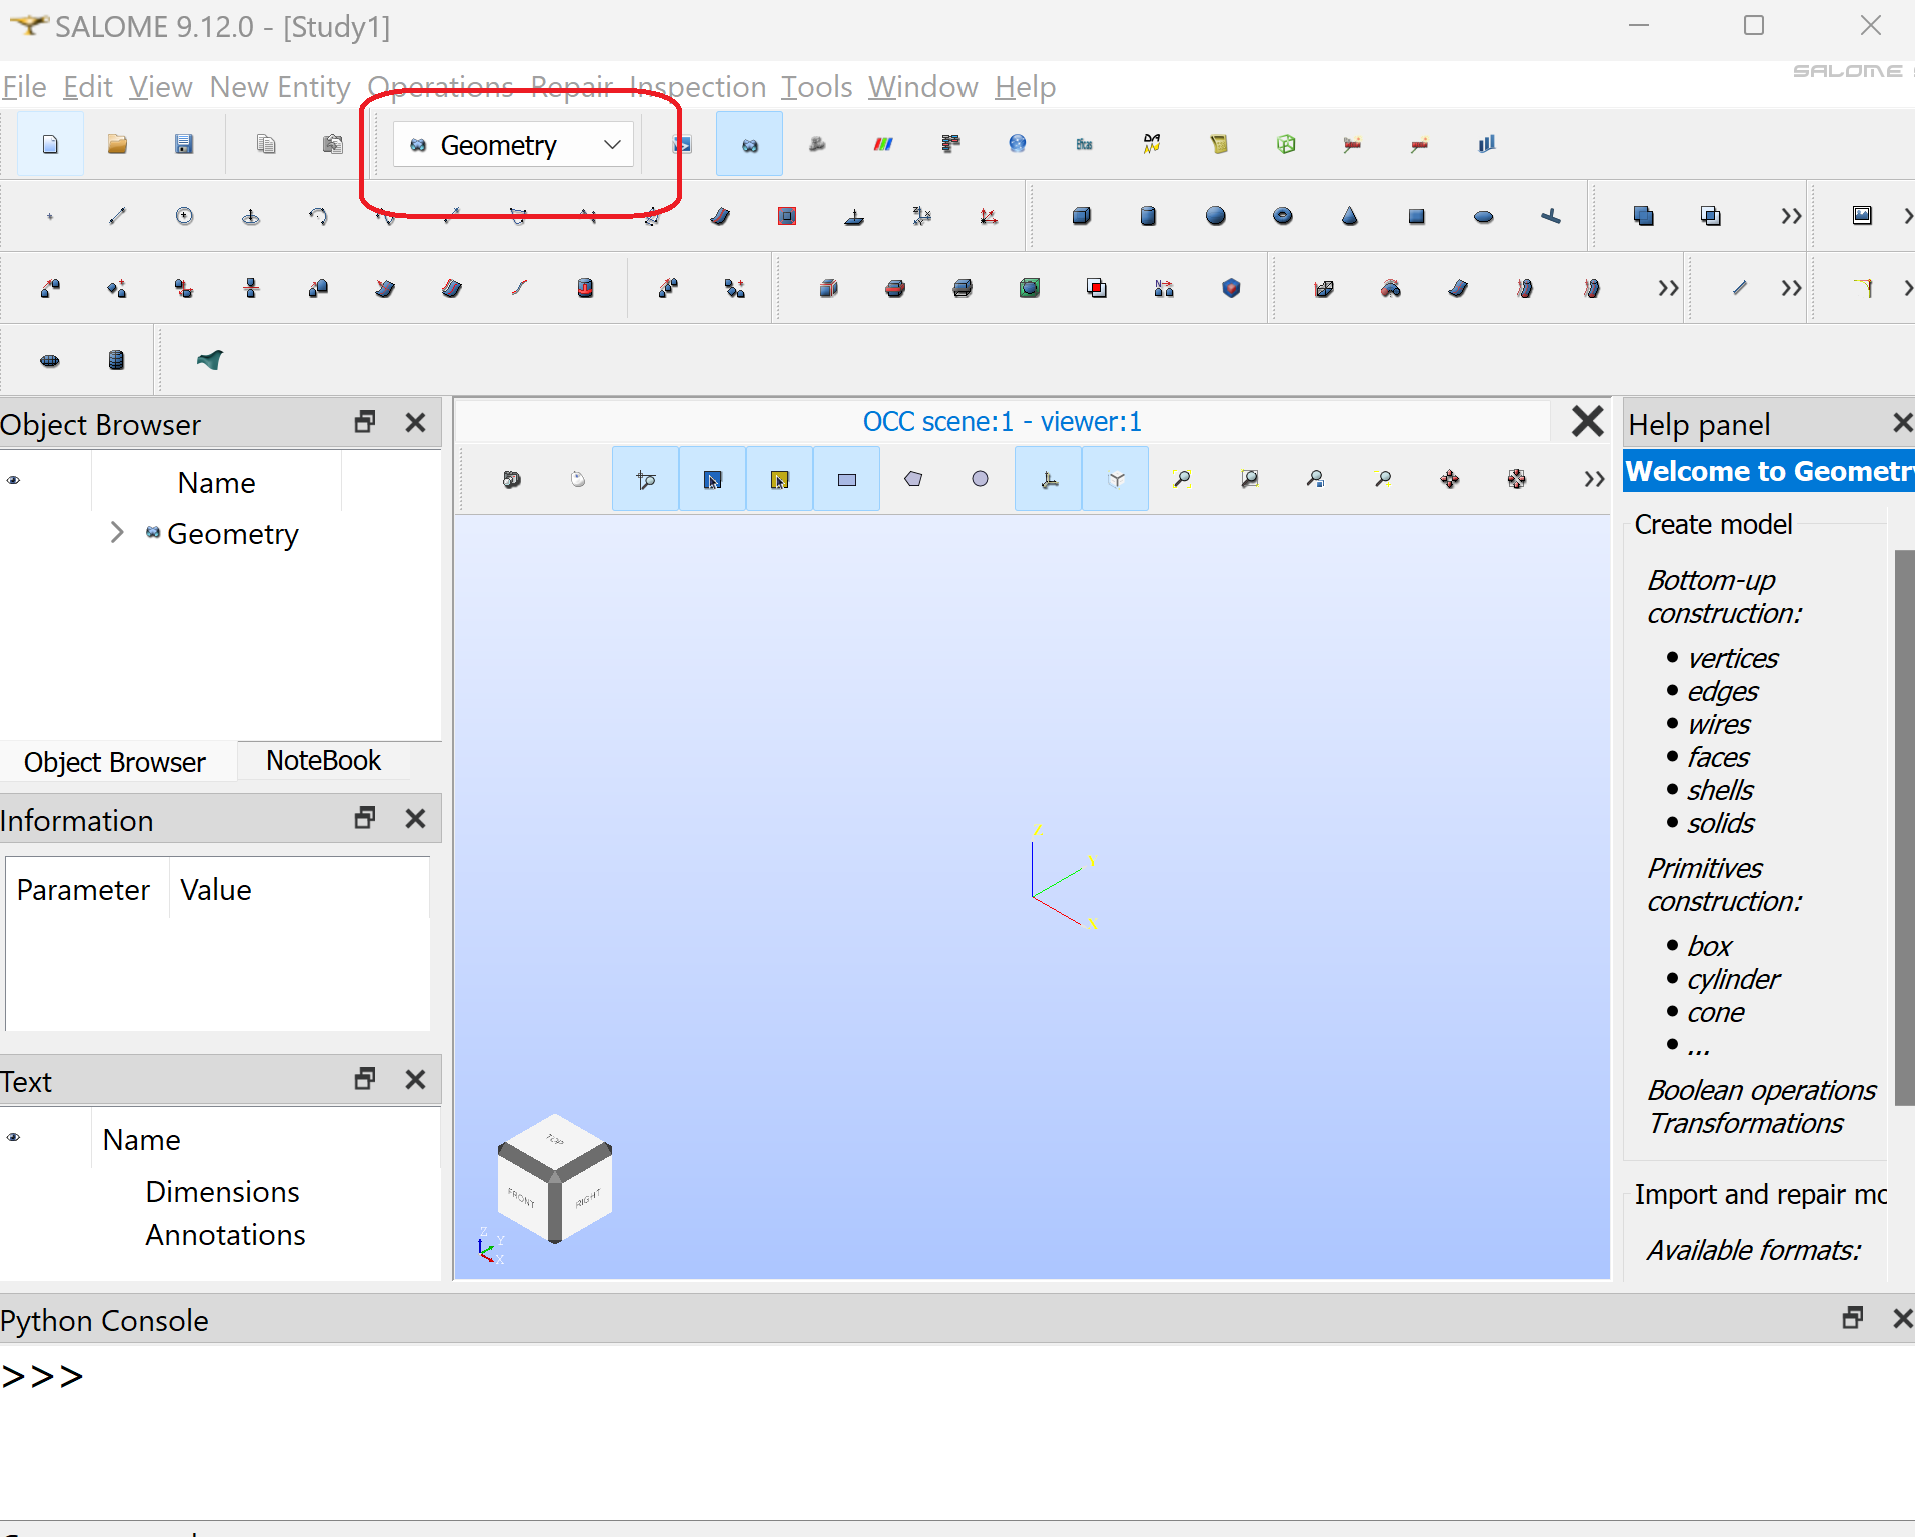
Open SALOME and create a new study.
Activate the Geometry module
Create a first square by clicking “Create rectangular face”. Keep the default parameters. Click “Apply and Close”
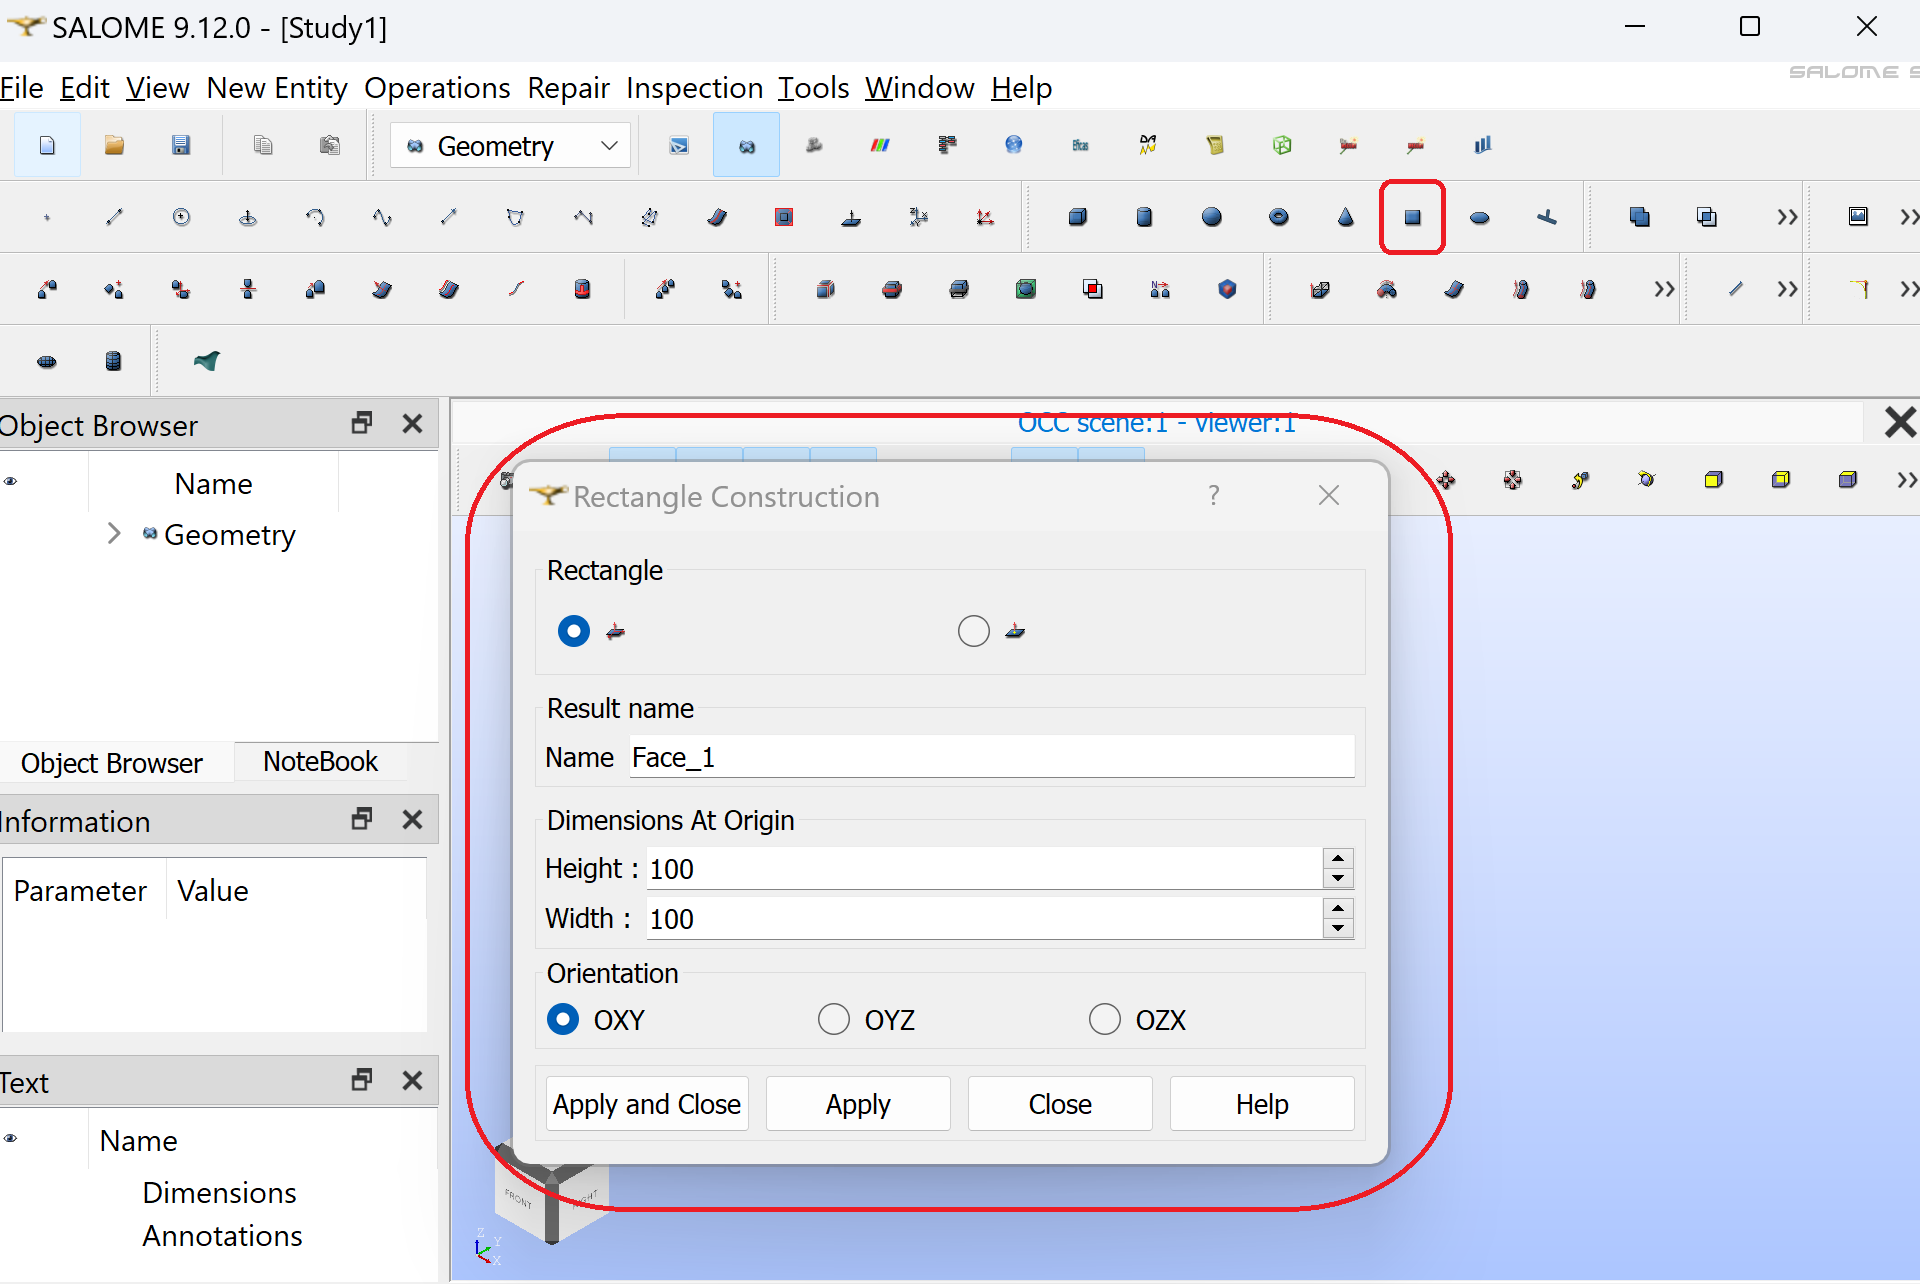
Repeat the operation to create a second square
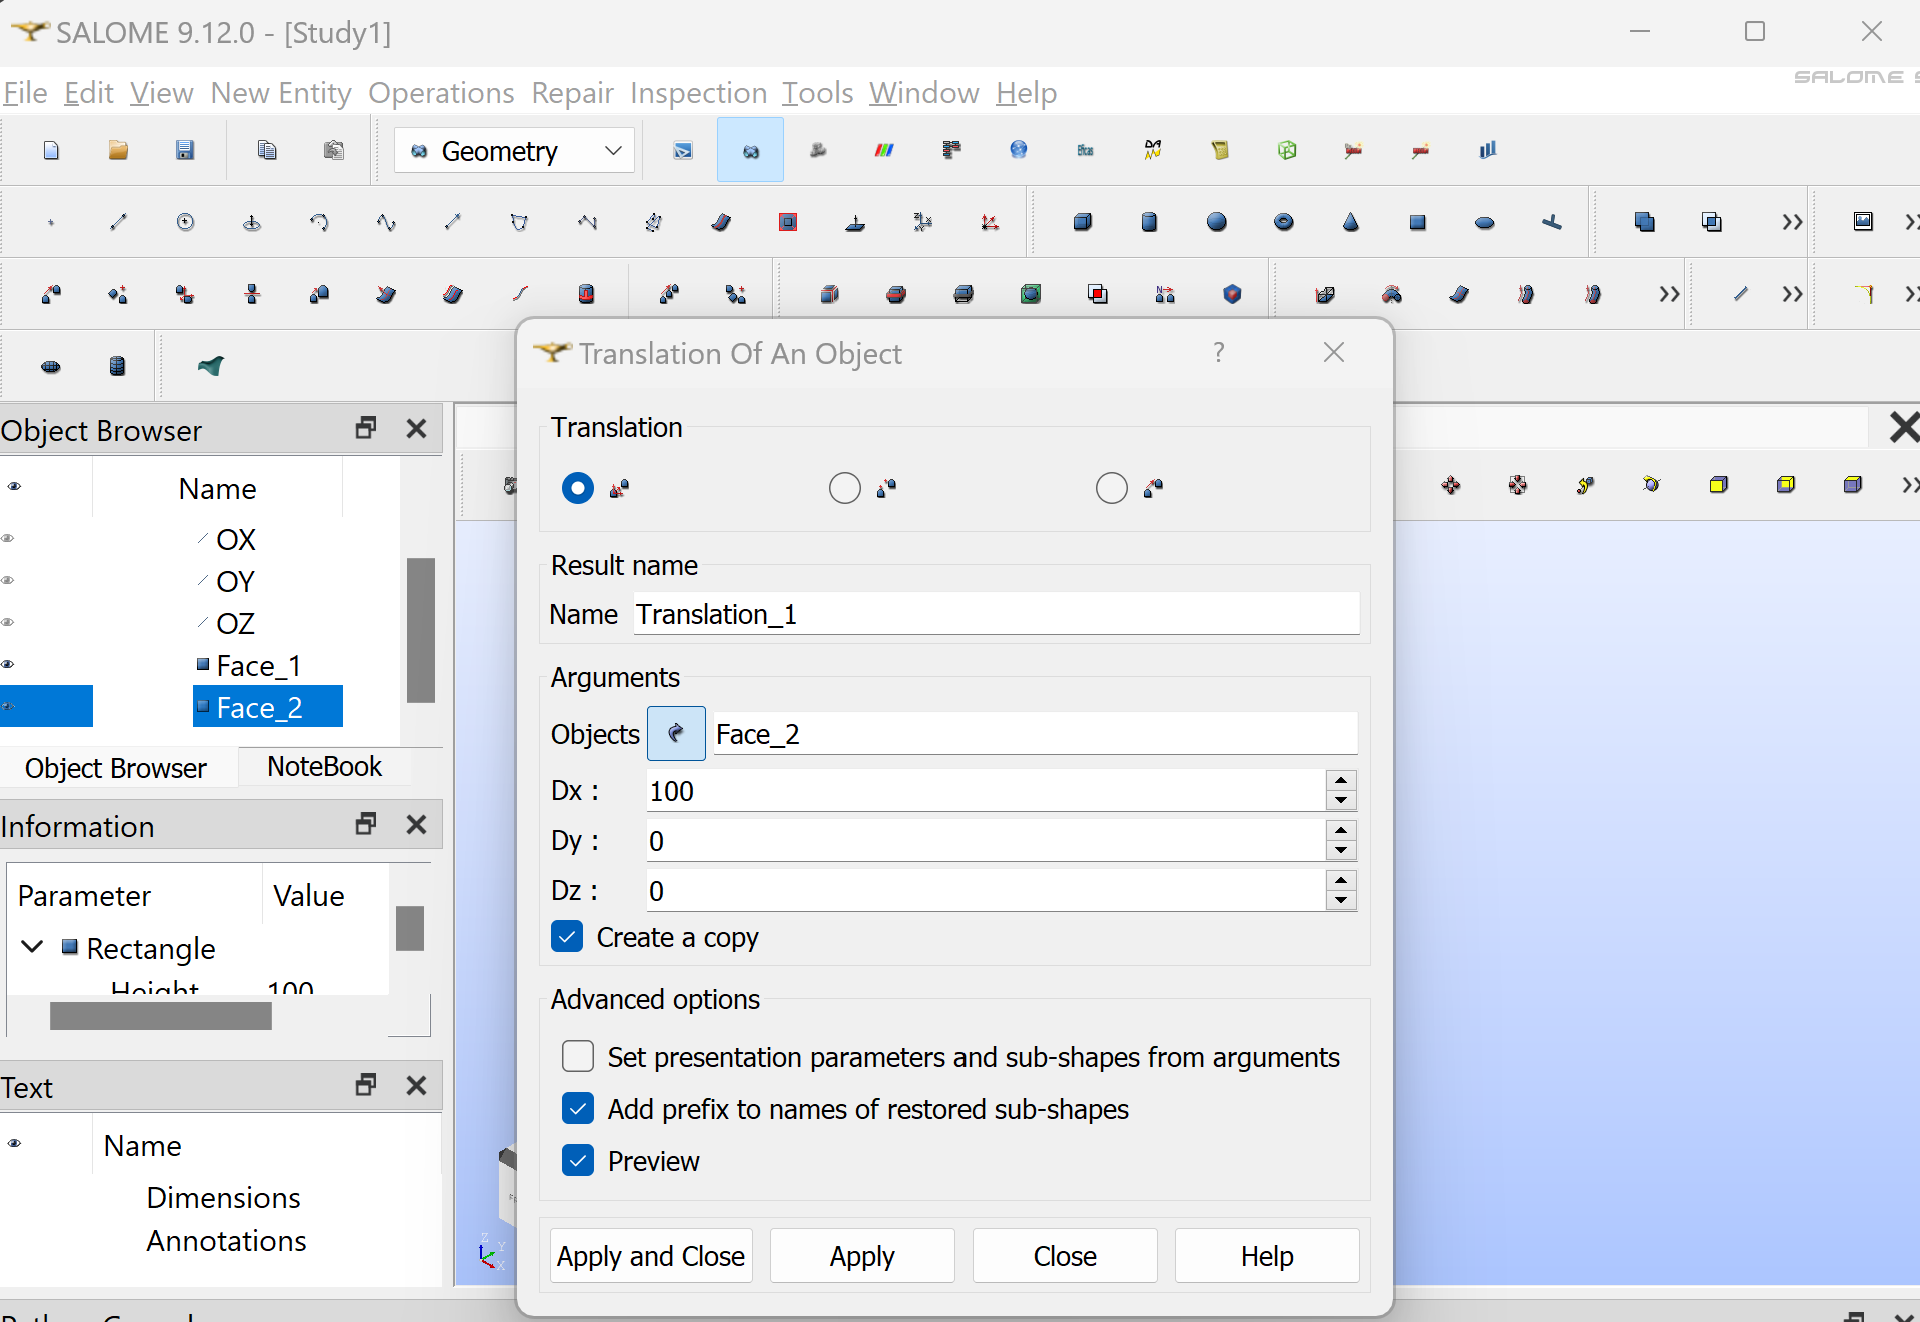
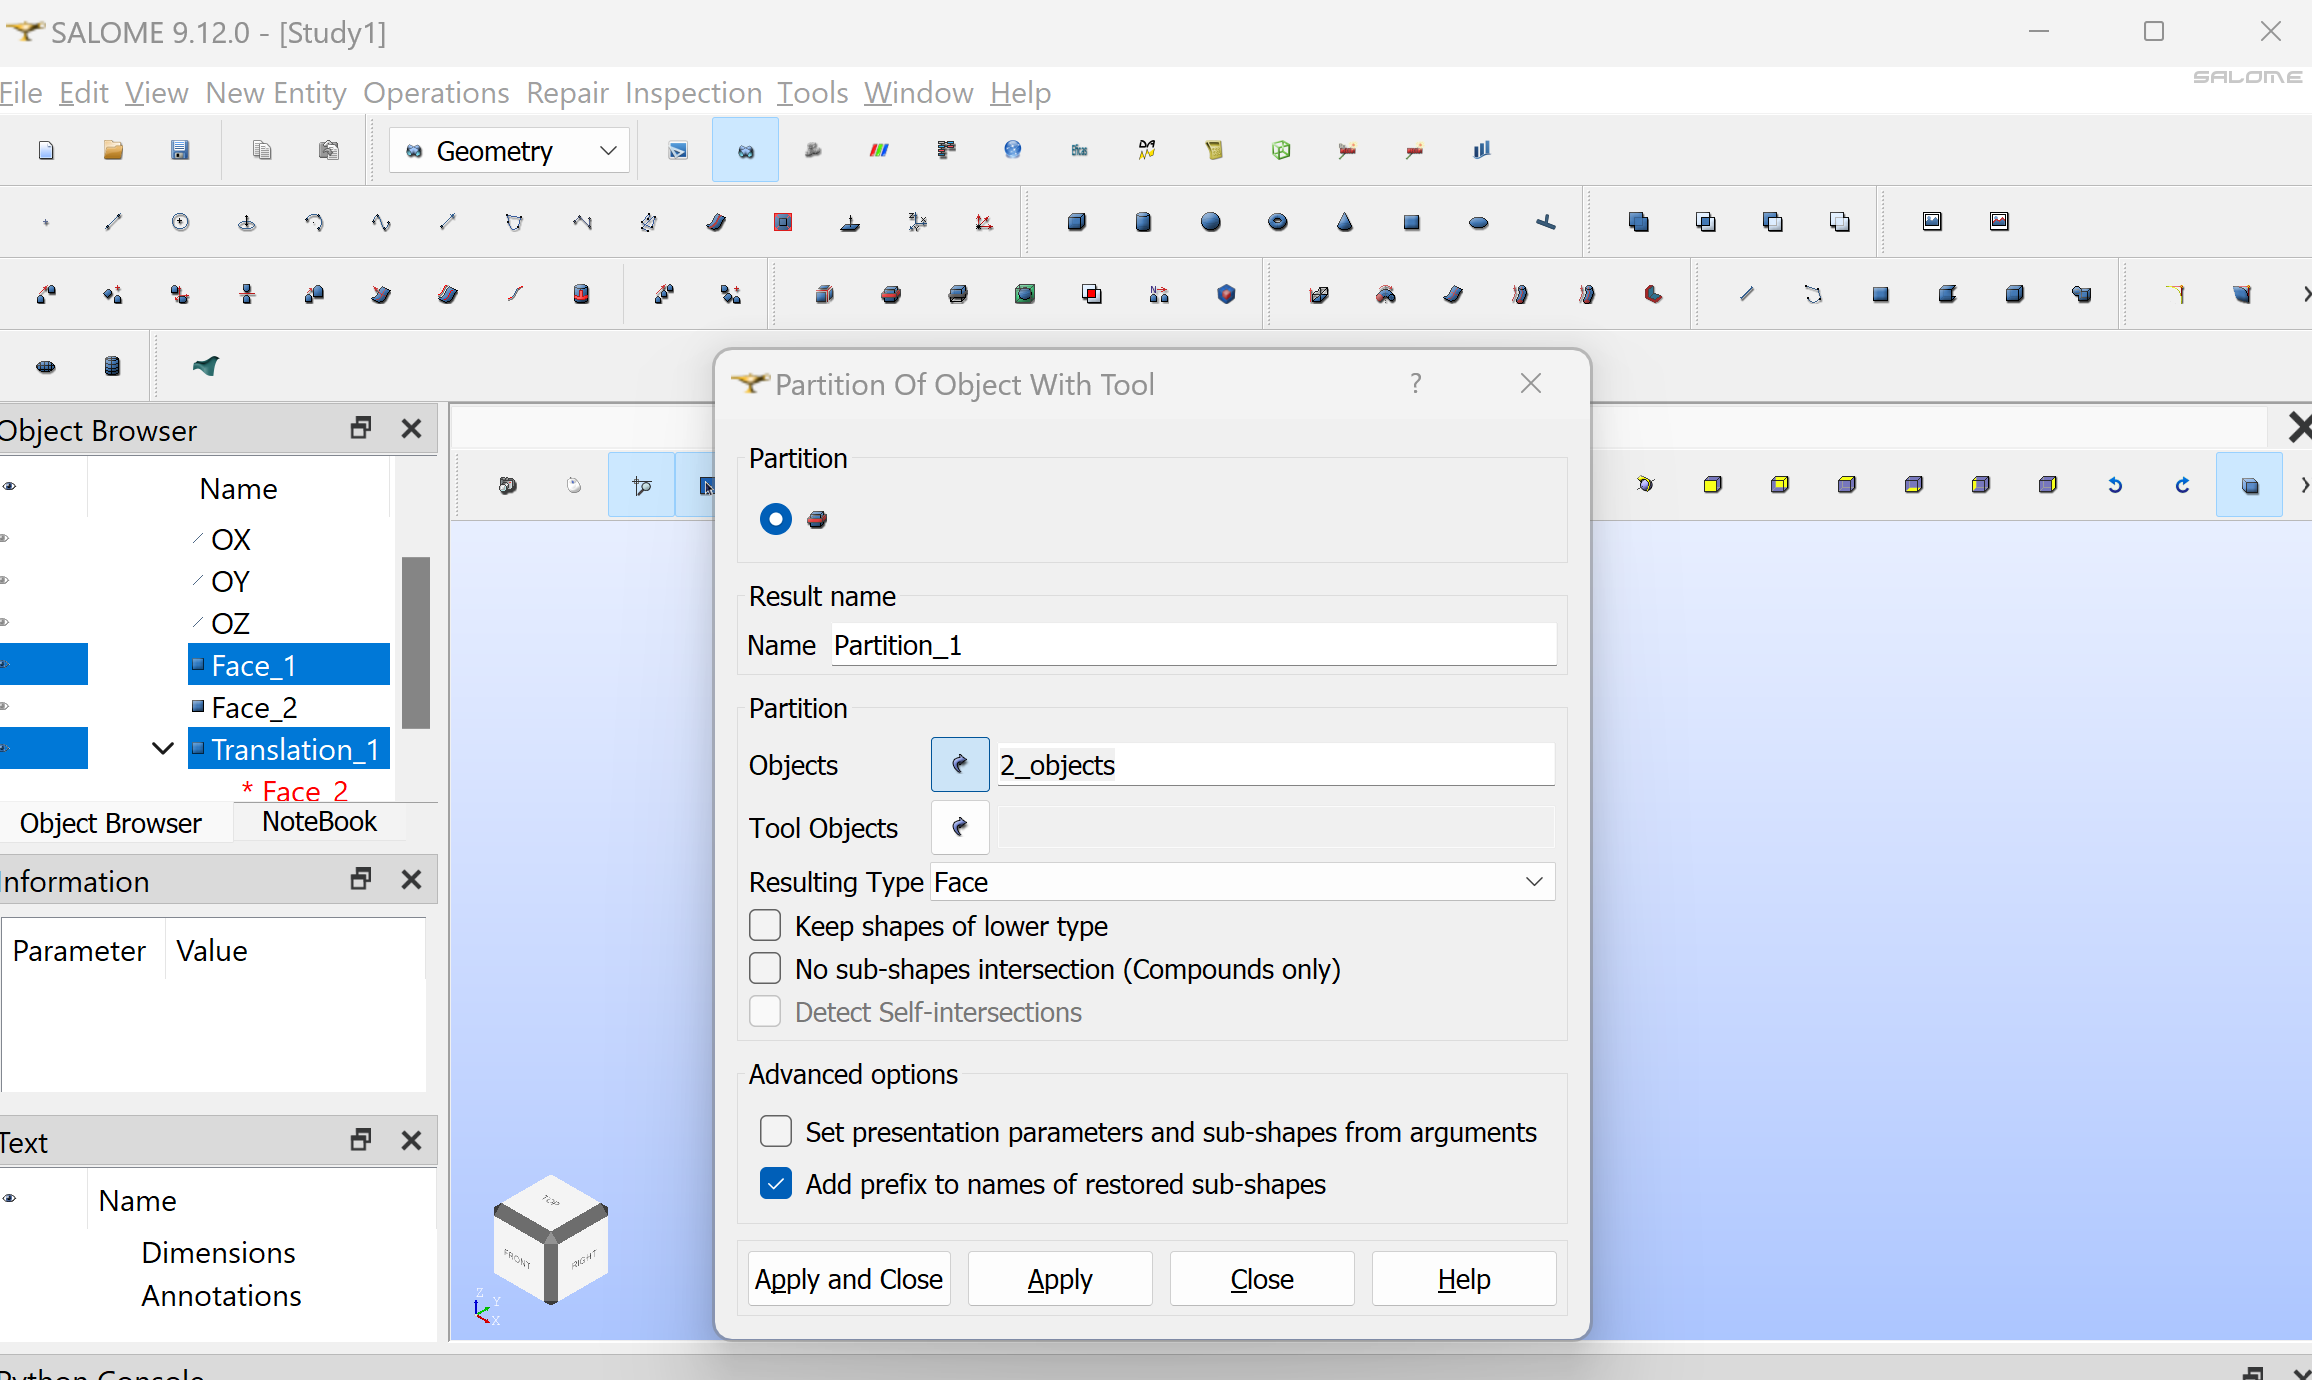
Translate the second square by clicking “Operations/Transformation/Translation”
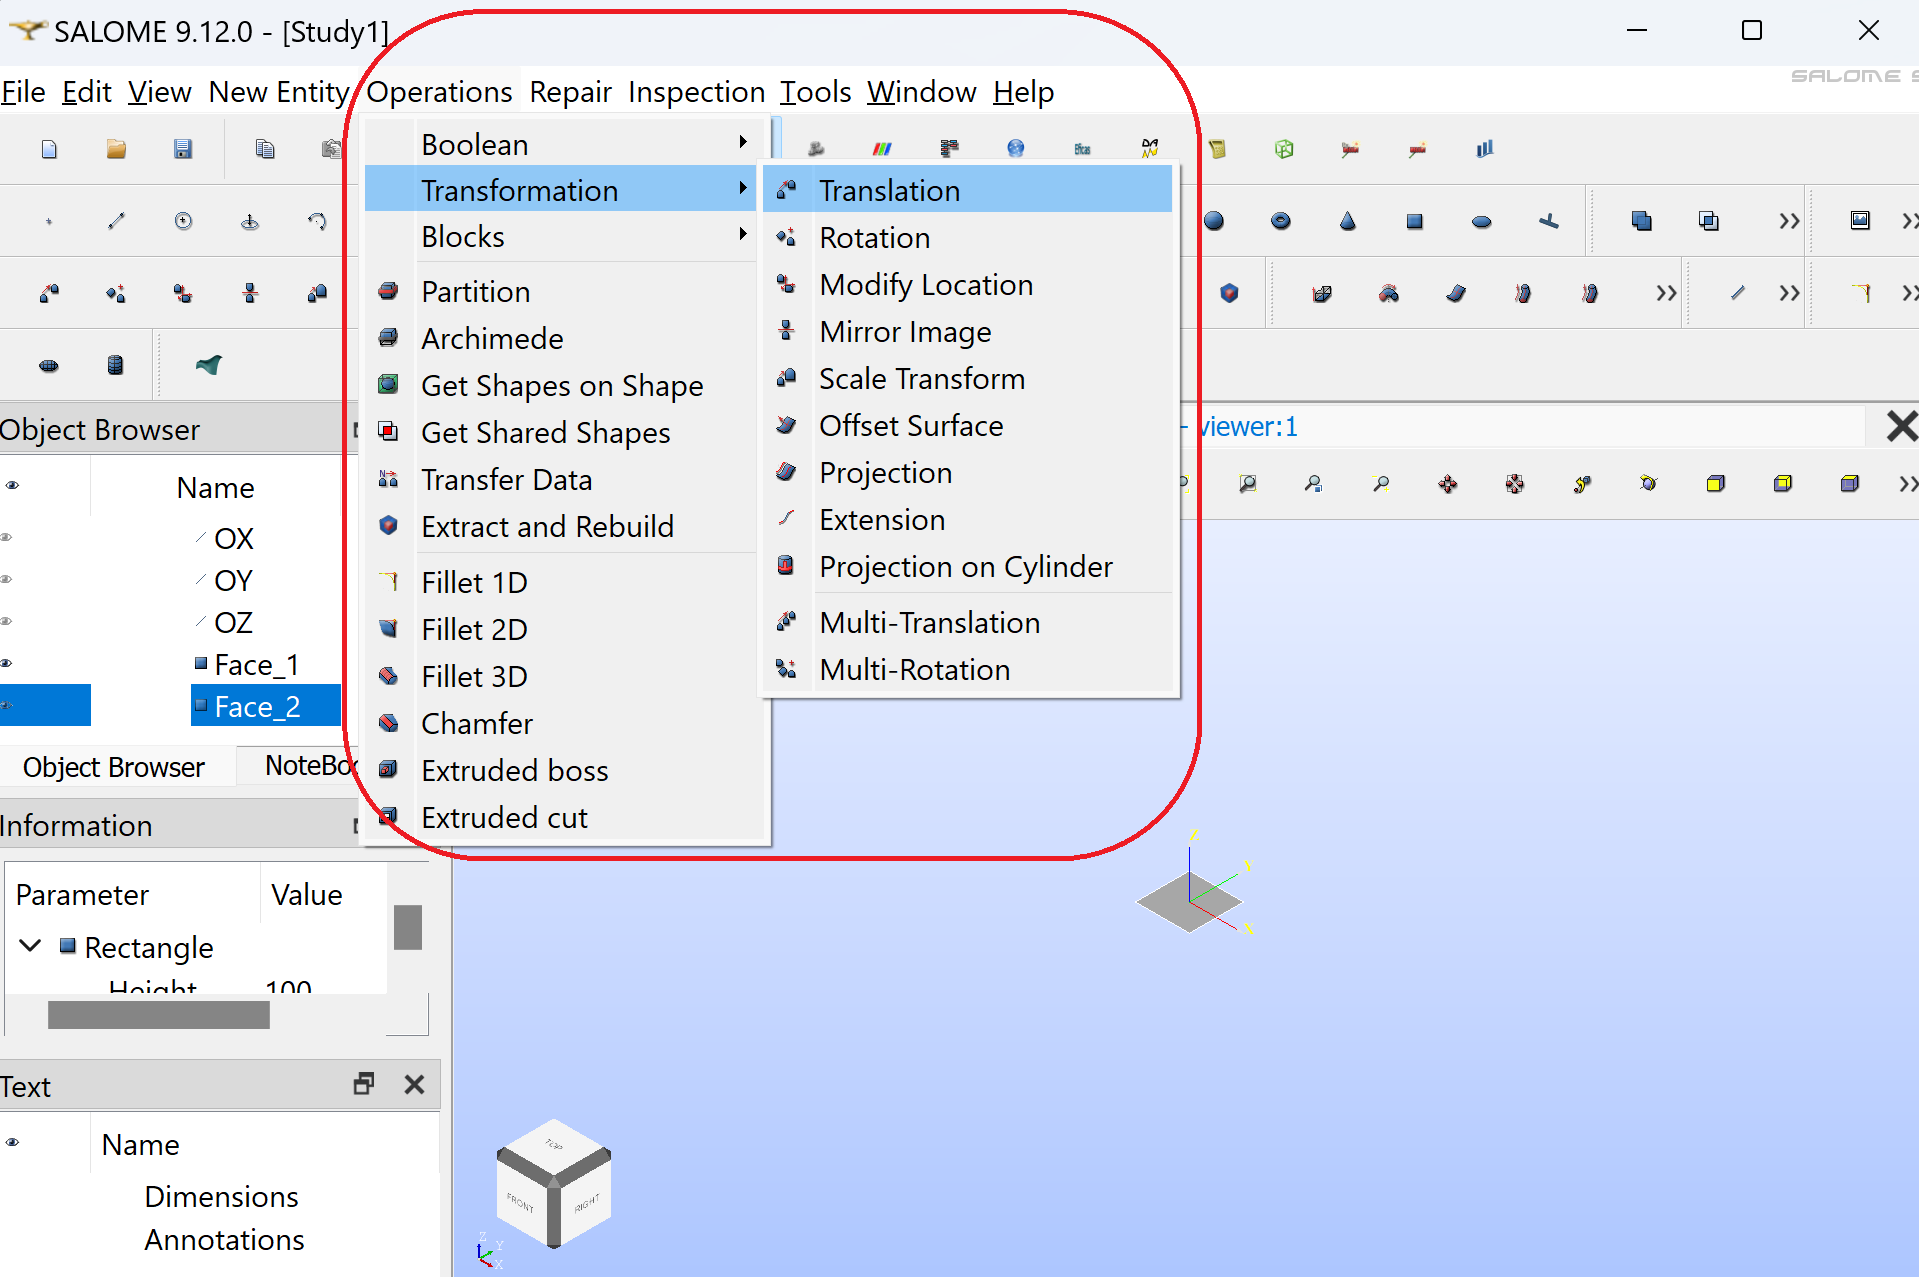
Make sure Face 2 is selected. Enter 100 for the Dx value. Click “Apply and Close”
Create a compound by clicking “New Entity/Build/Compound” make sure Face_1 and Translation_1 are selected then click “Apply and Close”.
Create a group “New Entity/Group/Create group”. In Shape Type, select the 2D surface. Name the group “left_volume”. Make sure Compound_1 is selected. Click on the left square and click “Add” (2 should appear in the white window). Click “Apply and Close”.
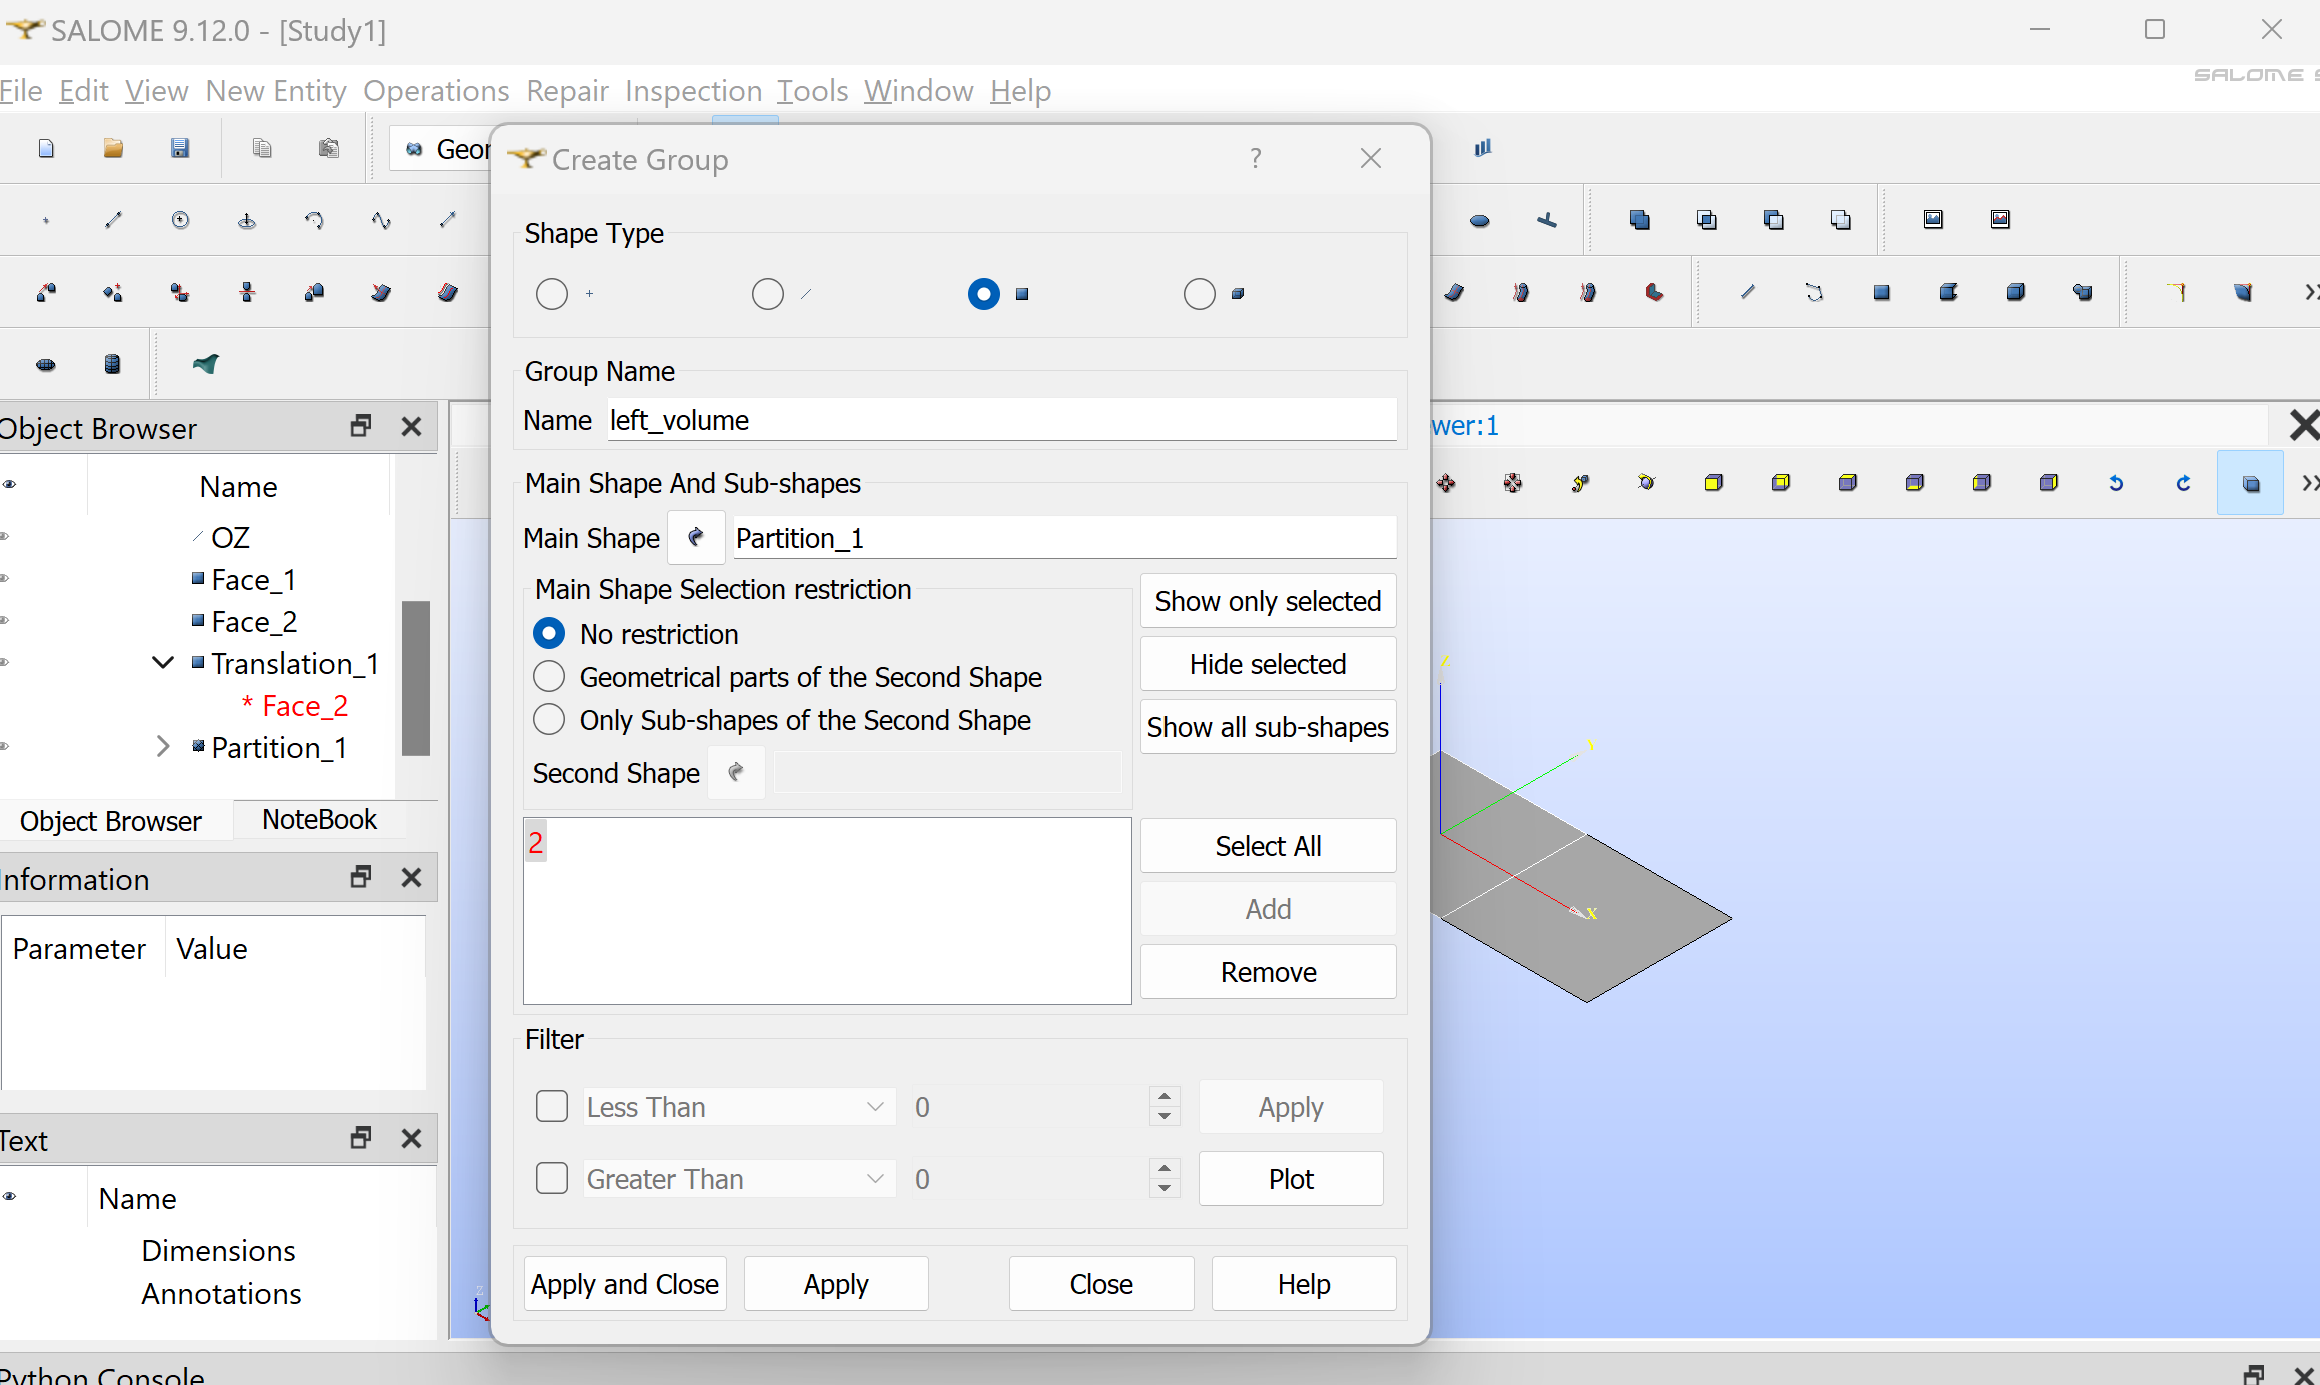
Repeat the operation to create a group “right_volume” with the right square (12 should appear in the white window).
Create another group “left_boundary” but this time in Shape Type select the 1D curve. Click on the left edge of the left square and click “Add”. Click “Apply and Close”.
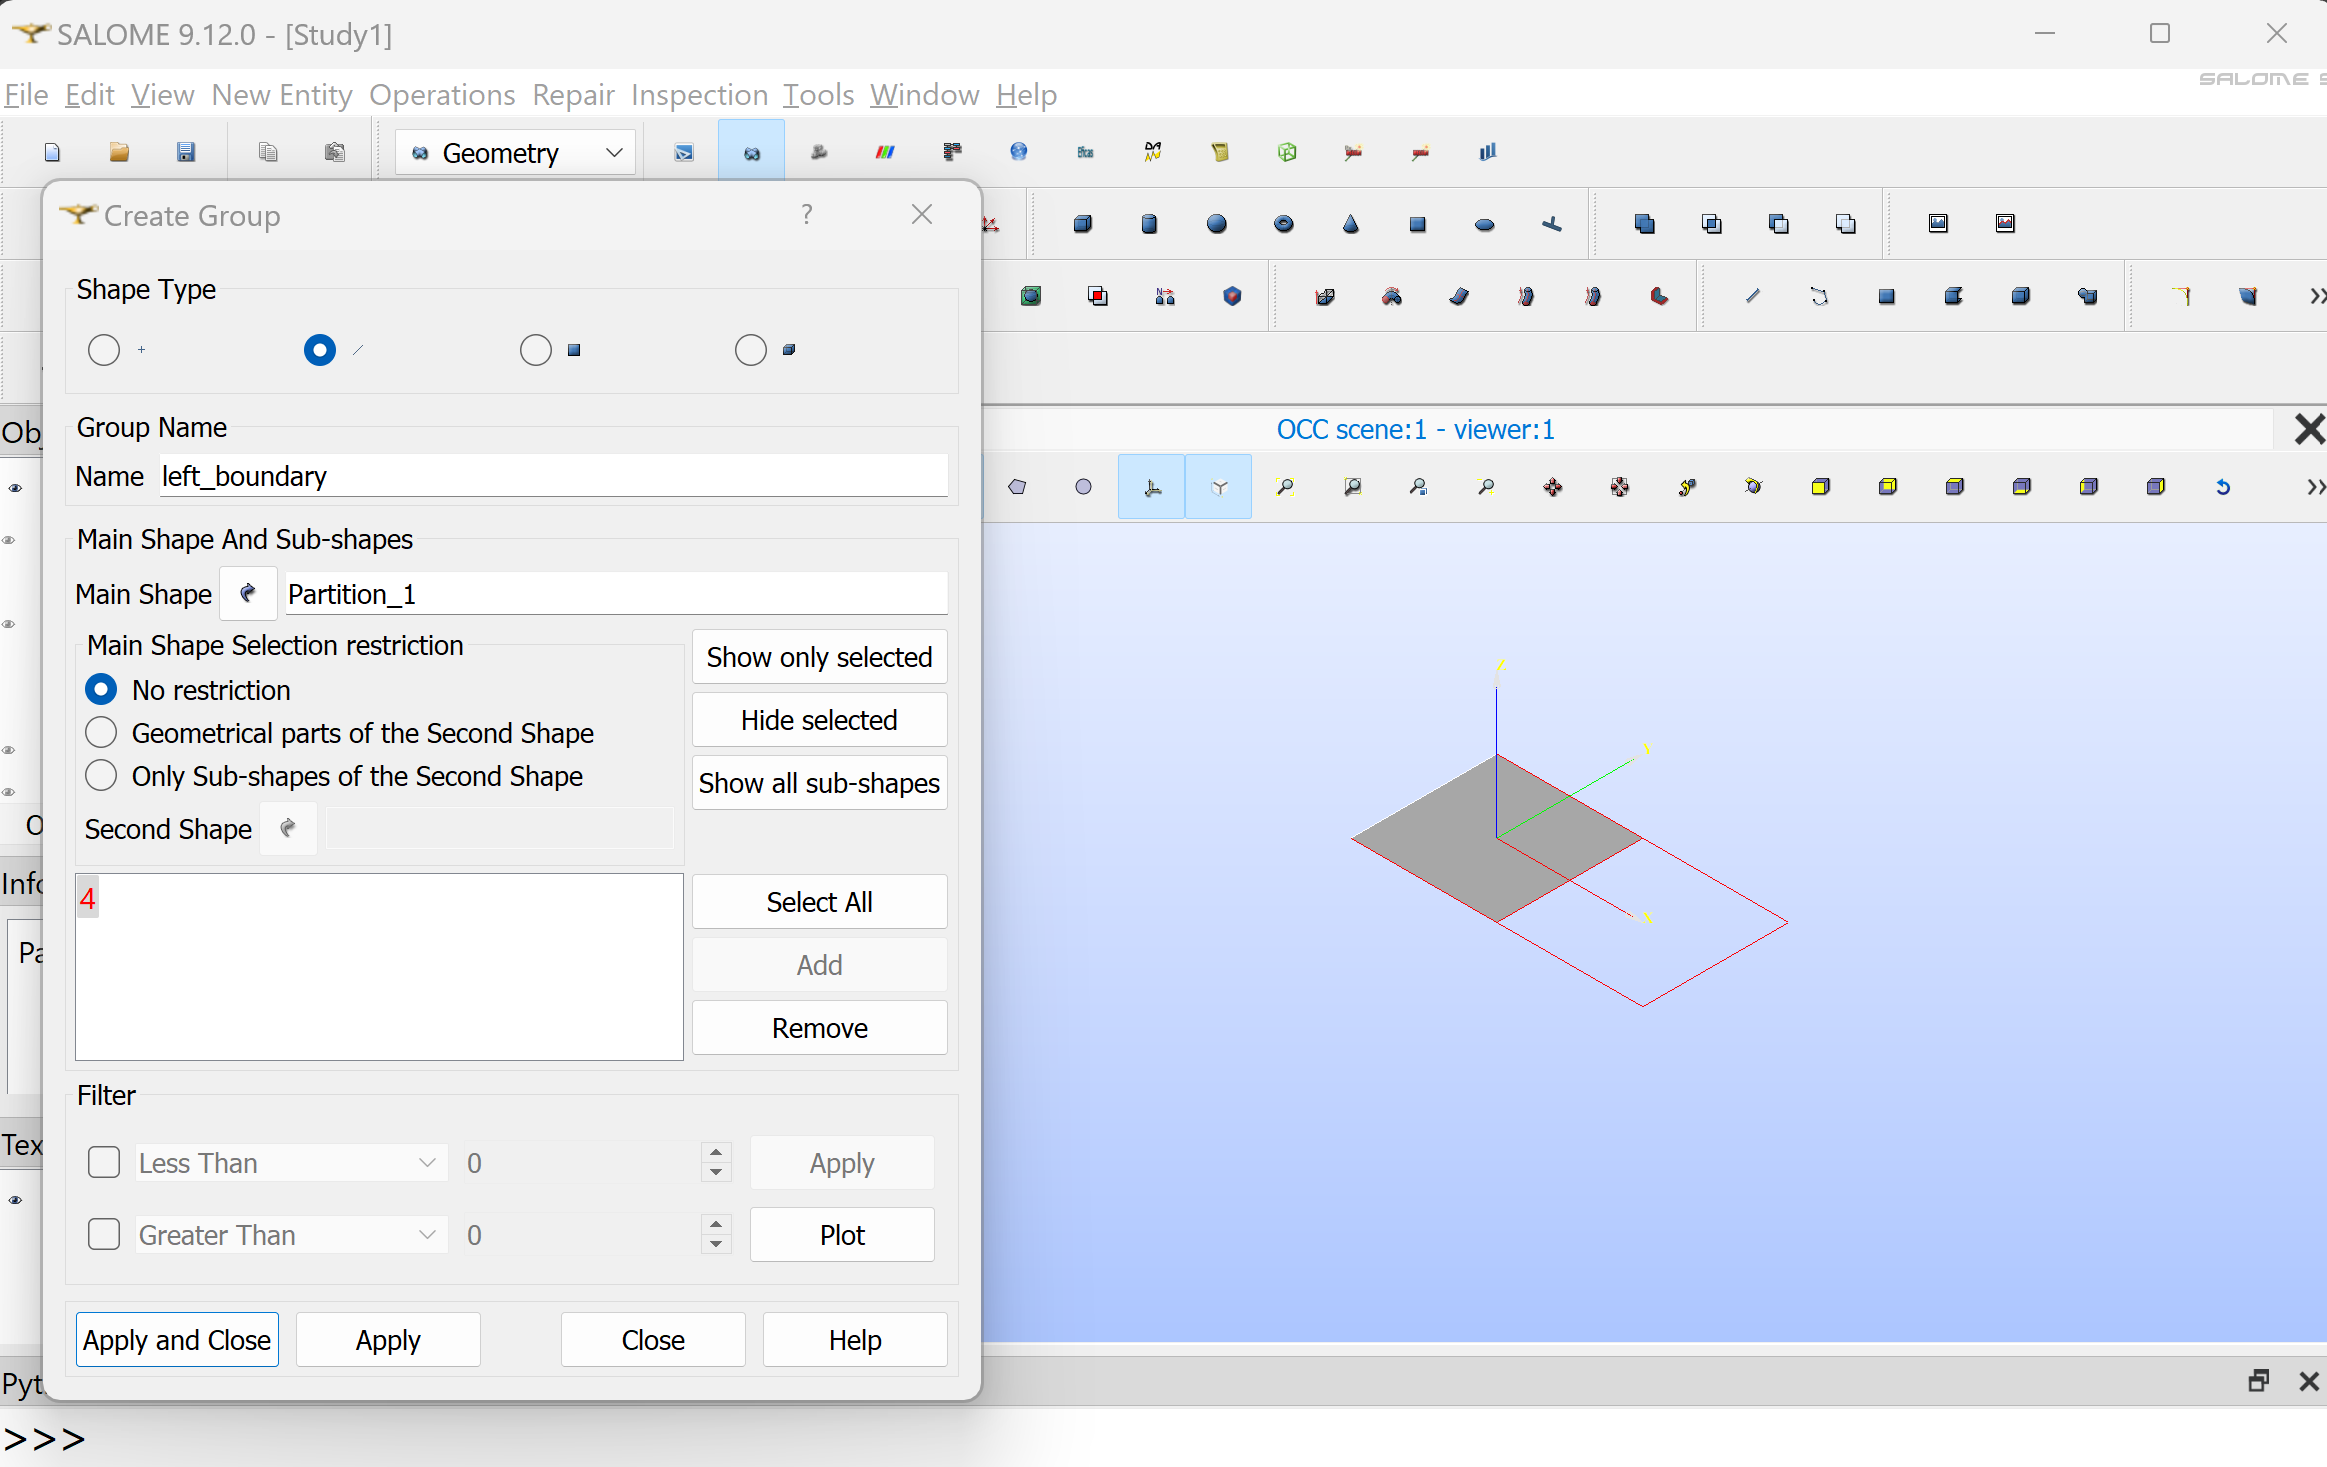
Repeat the operation to create a group “right_boundary” with the right edge of the right square. Your study should look like:

Click on “Mesh” to activate the mesh module.
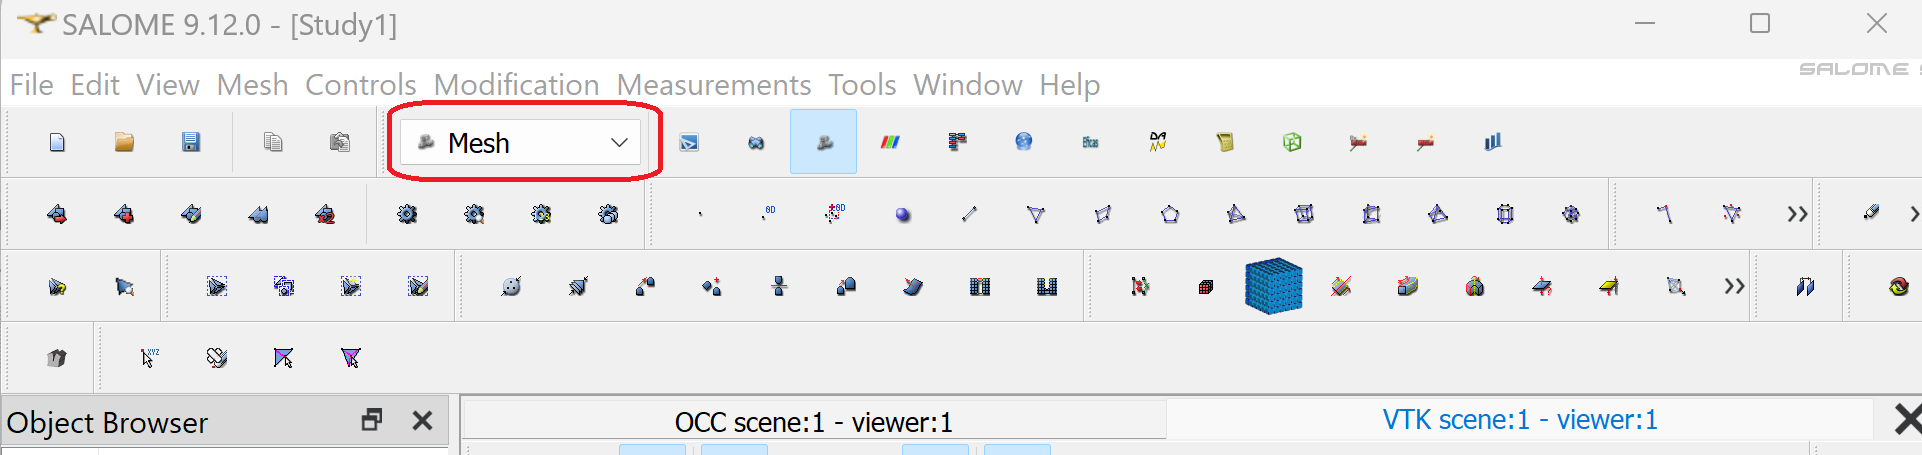
Create a mesh by clicking “Mesh/Create Mesh”.
Make sure Compound_1 is selected in “Geometry”. Under the 2D tab, select “NETGEN 1D-2D” as algorithm.
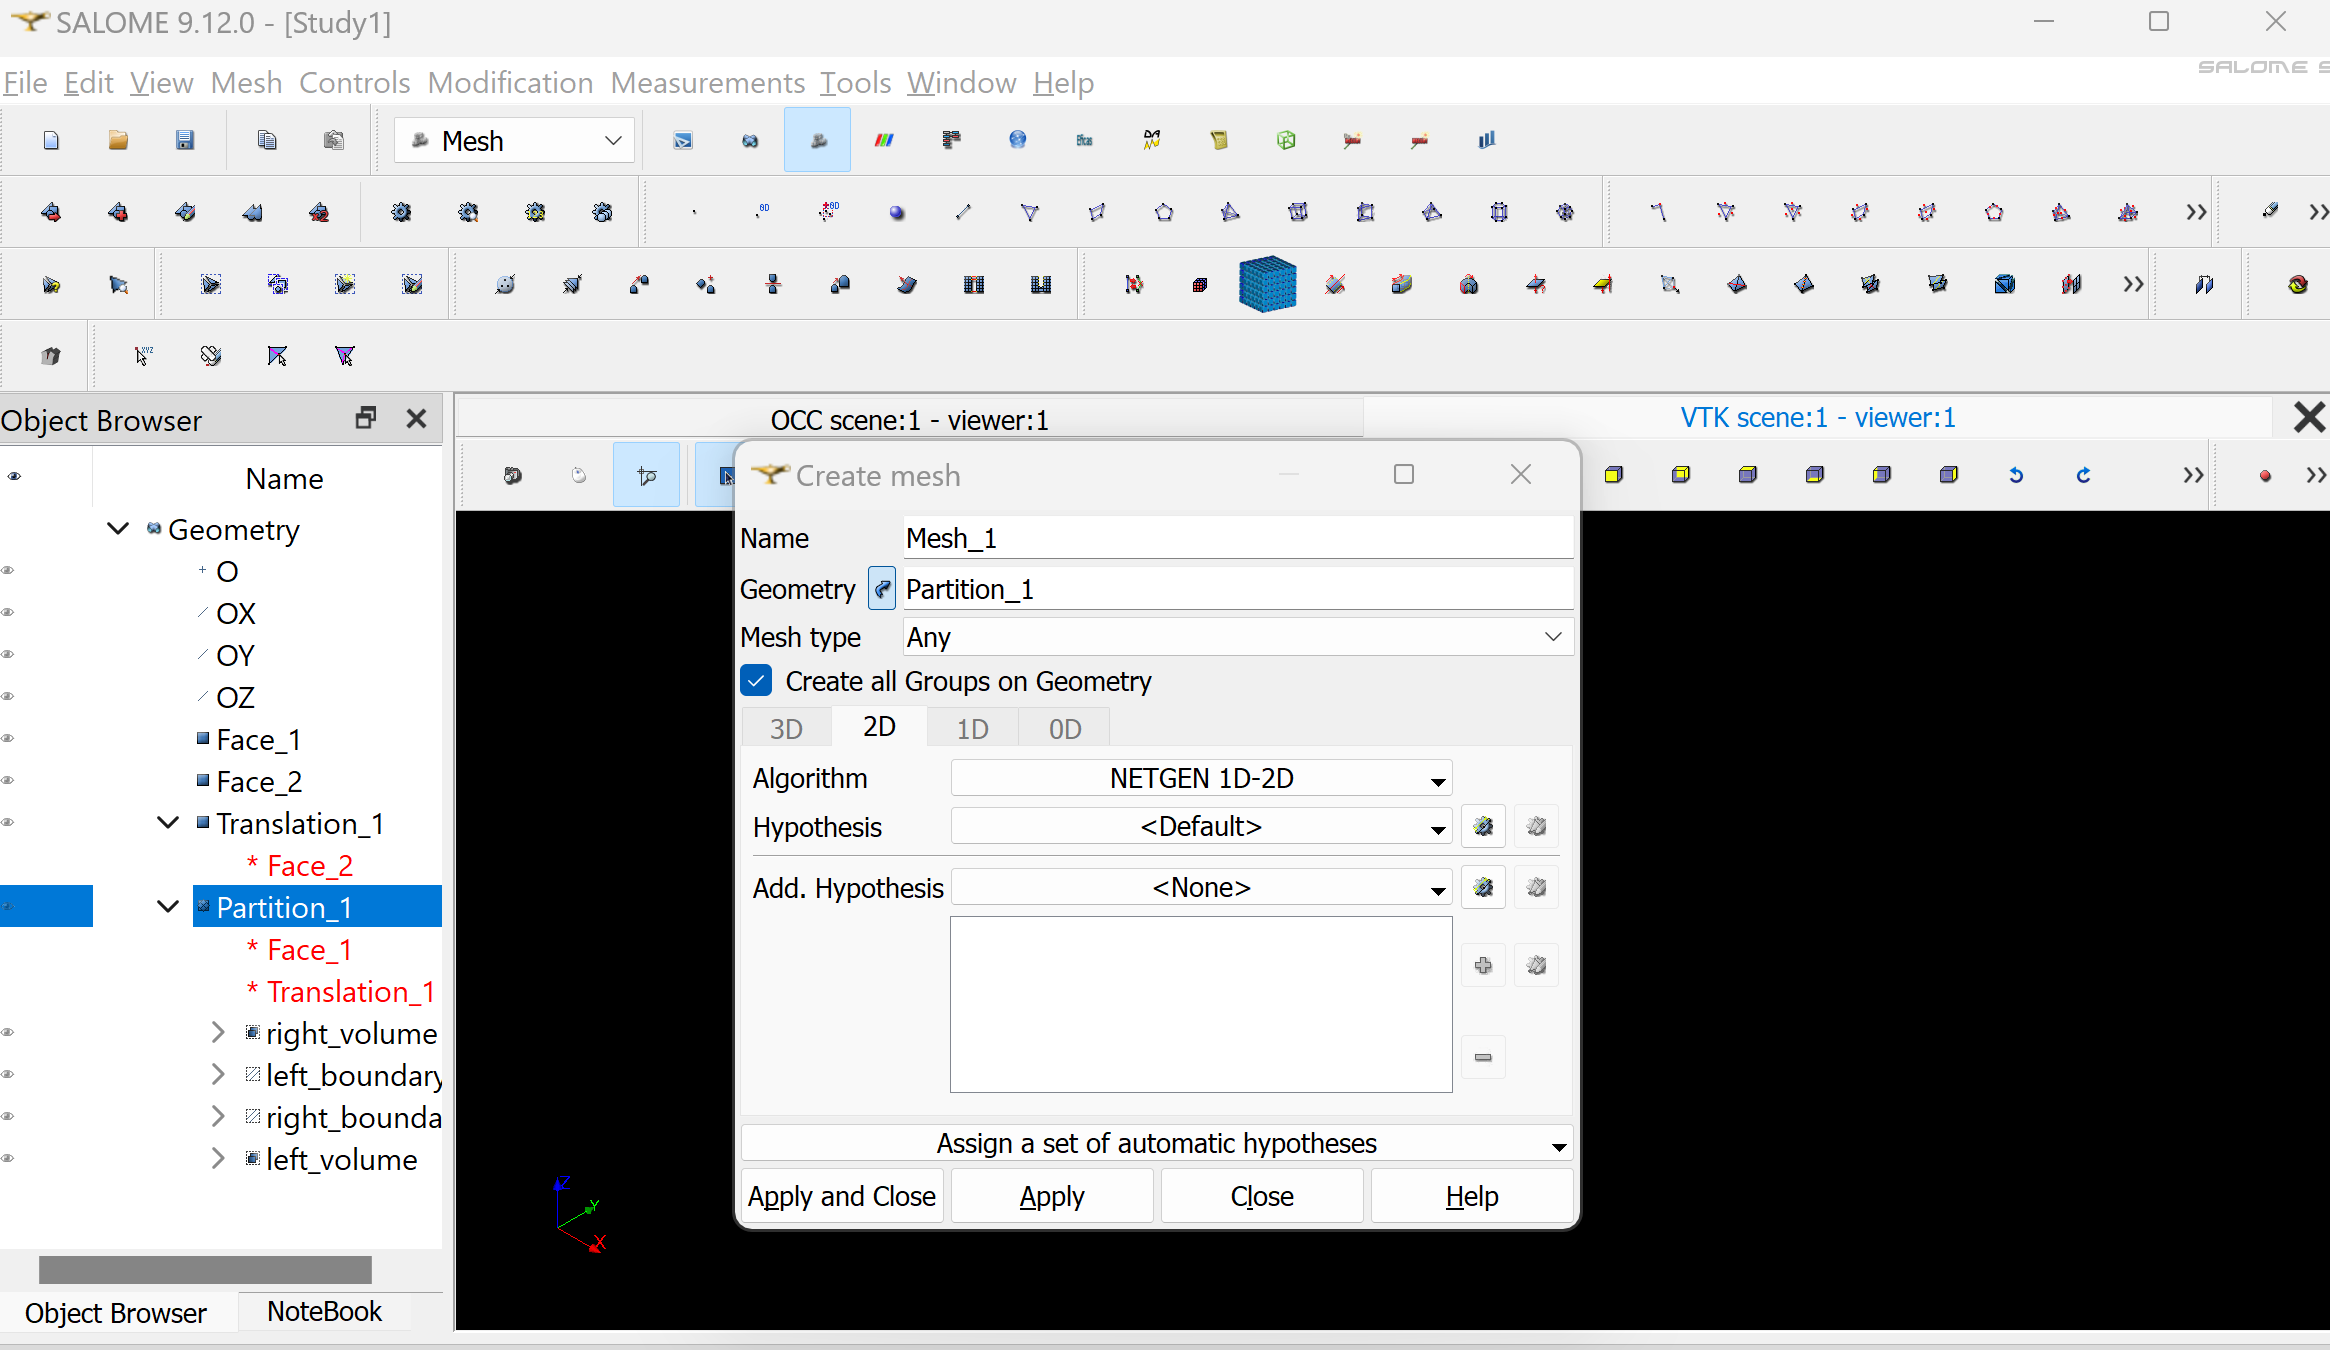
Next to “Hypothesis” click on the gear symbol. Select “NETGEN 2D Simple Parameters”. Click Ok. Click “Apply and Close”.
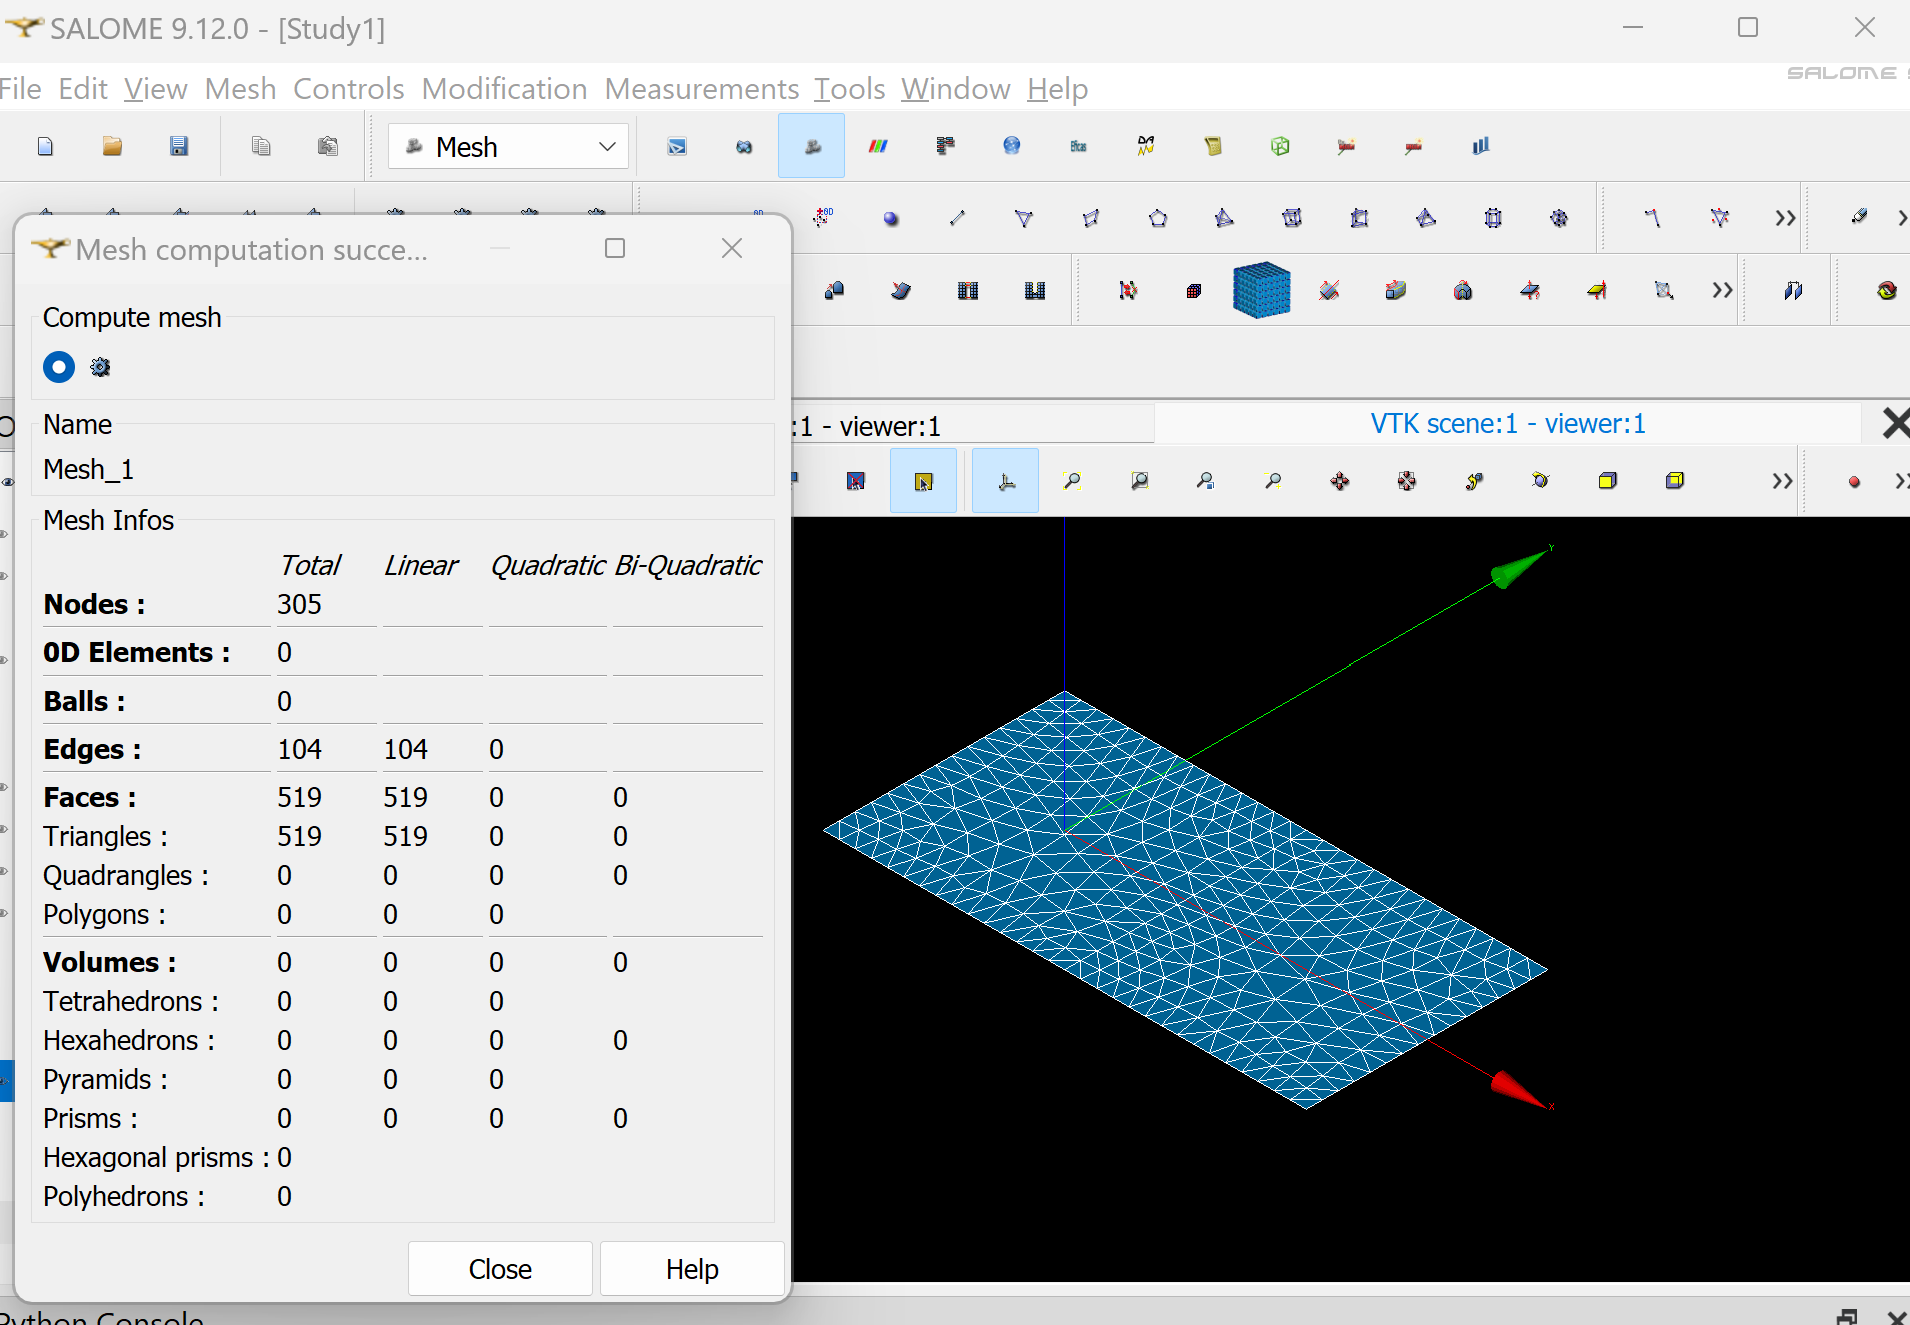
In the Objet Browser, under Mesh_1 you should see Groups of Edges and Groups of Faces, containing left_boundary, right_boundary, left_volume and right_volume.
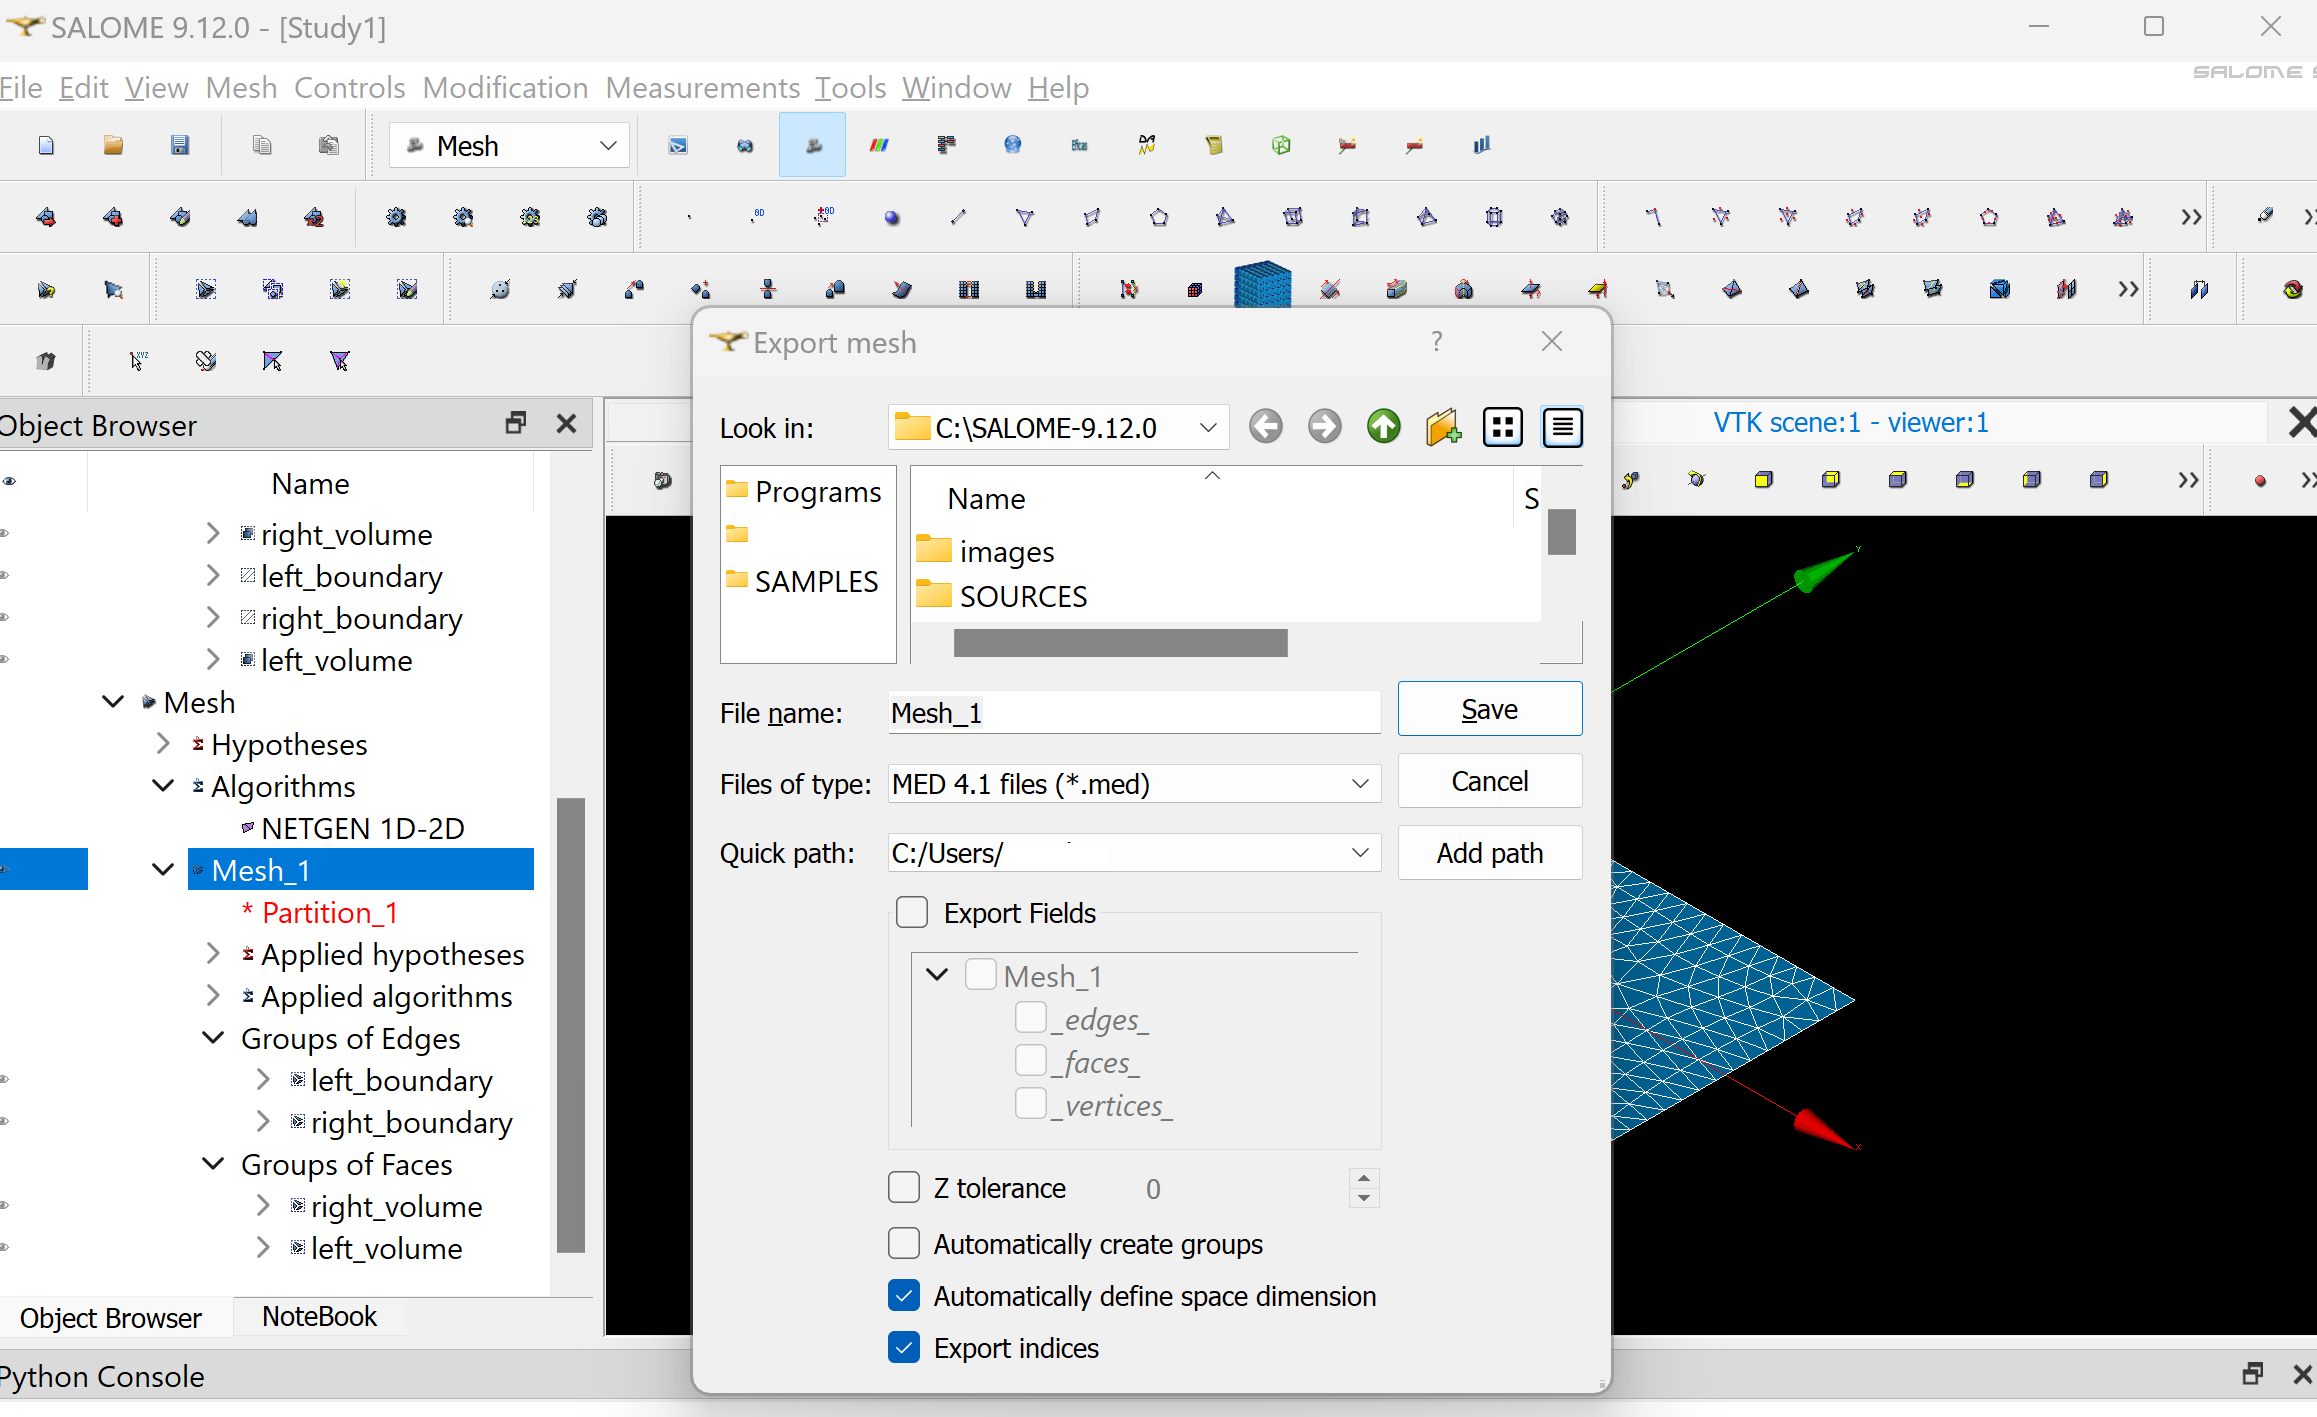
Export the mesh to MED by right clicking on Mesh_1 in the Object Browser, then Export/MED file. Choose a location where you want to write your MED file and click Save.
Convert the mesh to XDMF format#
To use meshes generated in SALOME with FESTIM, we first need to convert them from the .med format to the .xdmf format supported by DOLFINx.
Using the meshio library, this conversion can be done easily from Python.
Here is an example utility function, convert_med_to_xdmf, which reads a .med file and writes out the corresponding .xdmf mesh and boundary data.
Install meshio
If you’ve installed FESTIM with conda, we strongly recommend installing meshio with:
conda install -c conda-forge meshio
Otherwise, you can install meshio with pypi:
python -m pip install meshio[all]
import meshio
from typing import Optional

def convert_med_to_xdmf(
    med_file : str,
    cell_file: Optional[str] = "mesh_domains.xdmf",
    facet_file: Optional[str] = "mesh_boundaries.xdmf",
    cell_type: Optional[str] = "tetra",
    facet_type: Optional[str] = "triangle",
):
    """Converts a .med mesh to .xdmf

    Args:
        med_file: the name of the MED file
        cell_file: the name of the file containing the volume markers. Defaults to "mesh_domains.xdmf".
        facet_file: the name of the file containing the surface markers.. Defaults to "mesh_boundaries.xdmf".
        cell_type: The topology of the cells. Defaults to "tetra".
        facet_type: The topology of the facets. Defaults to "triangle".

    Returns:
        dict, dict: the correspondence dict, the cell types
    """

    msh = meshio.read(med_file)

    correspondance_dict = {-k: v for k, v in msh.cell_tags.items()}

    cell_data_types = msh.cell_data_dict["cell_tags"].keys()

    for mesh_block in msh.cells:
        if mesh_block.type == cell_type:
            meshio.write_points_cells(
                cell_file,
                msh.points,
                [mesh_block],
                cell_data={"f": [-1 * msh.cell_data_dict["cell_tags"][cell_type]]},
            )
        elif mesh_block.type == facet_type:
            meshio.write_points_cells(
                facet_file,
                msh.points,
                [mesh_block],
                cell_data={"f": [-1 * msh.cell_data_dict["cell_tags"][facet_type]]},
            )

    return correspondance_dict, cell_data_types
The subdomains (both volumes and surfaces) defined in the .med file were assigned tags in SALOME.
These tags are essential, as they allow FESTIM to associate material properties and boundary conditions with specific regions of the mesh.
The convert_med_to_xdmf function returns a dictionary that maps subdomain names to their corresponding tag values.
For example, in the mesh used here, the volume corresponding to tungsten is tagged with the value 6.
correspondance_dict, cell_data_types = convert_med_to_xdmf(
    "salome/Mesh_1.med",
    cell_file="salome/mesh_domains.xdmf",
    facet_file="salome/mesh_boundaries.xdmf",
    cell_type="triangle",
    facet_type="line",
)

print(correspondance_dict)
{np.int64(6): ['left_volume'], np.int64(7): ['right_volume'], np.int64(8): ['left_boundary'], np.int64(9): ['right_boundary']}
print(meshio.__version__)
5.3.5
Read in FESTIM#
Once the mesh has been converted to .xdmf format, it can be directly imported into a FESTIM simulation using the MeshFromXDMF class.
This class automatically reads the mesh geometry, volume tags, and facet tags from the corresponding .xdmf and .h5 files.
Here’s a basic example:
import festim as F

mesh = F.MeshFromXDMF("salome/mesh_domains.xdmf", "salome/mesh_boundaries.xdmf")
Optionally, the mesh can be scaled:
mesh.mesh.geometry.x[:] *= 1e-3
Visualise subdomains#
To visualise the subdomains, the meshtags must be generated first.
ft = mesh.define_surface_meshtags()
ct = mesh.define_volume_meshtags()
2026-07-15 17:33:54.187 ( 0.811s) [ 759846F8A440]vtkXOpenGLRenderWindow.:1458 WARN| bad X server connection. DISPLAY=
Complete example#
Here’s a complete example:
import festim as F

model = F.HydrogenTransportProblem()

model.mesh = F.MeshFromXDMF(
    volume_file="salome/mesh_domains.xdmf", facet_file="salome/mesh_boundaries.xdmf"
)

volume_left = F.VolumeSubdomain(id=6, material=F.Material(D_0=1, E_D=0.1))
volume_right = F.VolumeSubdomain(id=7, material=F.Material(D_0=5, E_D=0.3))

left_surface = F.SurfaceSubdomain(id=8)
right_surface = F.SurfaceSubdomain(id=9)

model.subdomains = [volume_left, volume_right, left_surface, right_surface]

H = F.Species("H")
model.species = [H]

model.boundary_conditions = [
    F.FixedConcentrationBC(species=H, value=1, subdomain=left_surface),
    F.FixedConcentrationBC(species=H, value=0, subdomain=right_surface),
]

model.temperature = 823

model.settings = F.Settings(atol=1e-10, rtol=1e-10, transient=False)

model.initialise()
model.run()
Other example#
The Monoblock tutorial is another tutorial using a SALOME mesh.